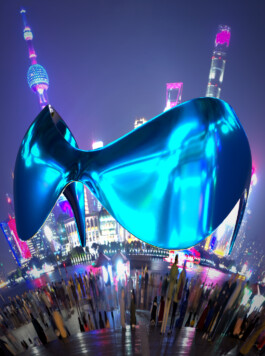
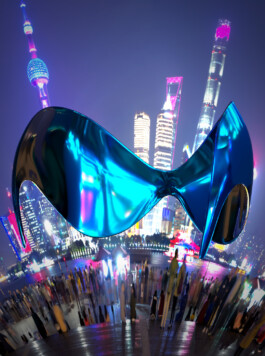
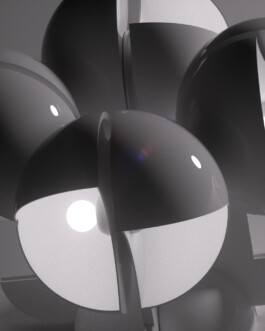
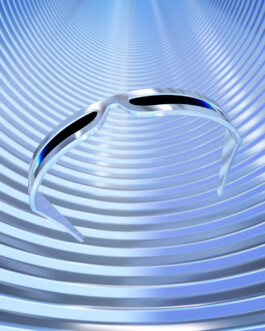
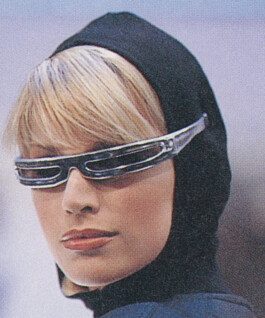
Thierry Mugler Centipede Sunglasses
These oversize sunglasses were created by Thierry Mugler in 1997 for his Spring Summer collection. Their futuristic design is a typical trait of Thierry Mugler's work, going extreme with everything he makes. The inspiration is often coming from sci-fi characters or curious animals, as it appears to be with this object.
Original media
Date of production - 1997
Designer - Thierry Mugler
Collection - Spring/Summer 97
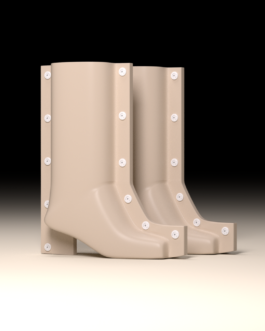
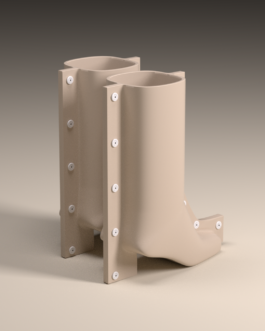
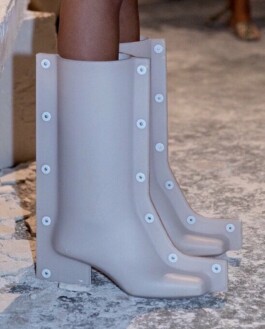
Elena Velez - Epoch Bolted Boot
This boot was a collaboration between Elena Velez and MORPH Design who created this very sculptural, avant-garde footwear piece by using techniques like CNC machining and thermoforming. The boot was worn by models during Velez’s SS22 "Rinascita" NYFW show.

Original media
Date of production - 2022
Designers - Elena Velez & MORPH Design
Collection - "Rinascita"
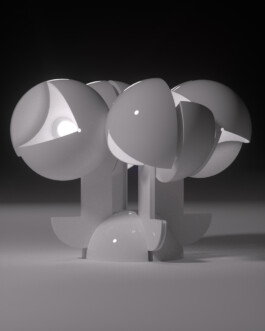
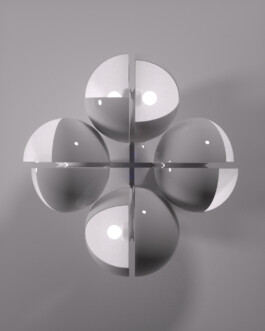
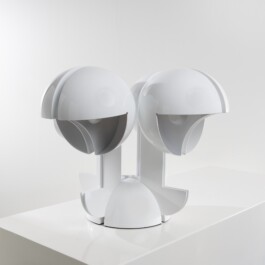
Ruspa by Gae Aulenti
A historical lamp designed by Gae Aulenti for the brand Martinelli Luce.
Consisting of four adjustable arms and four heads, the combination of the vertical movement of the arms and the lamp heads evokes a scraper, meaning "ruspa" in Italian.
Original media
Date of production - 1967
Designer - Gae Aulenti
Brand - Martinelli Luce
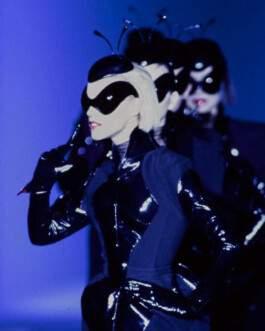
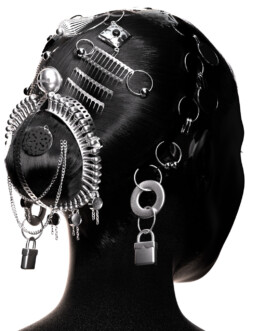
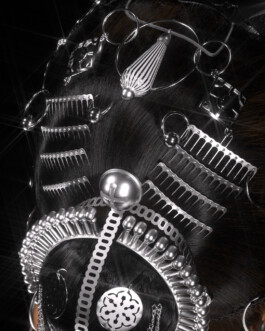
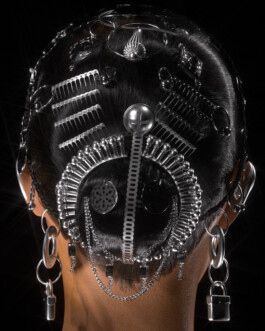
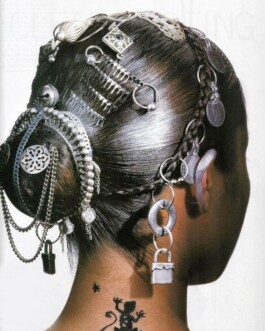
Jean-Paul Gaultier Headdress
The project is based off a photo taken by Irving Penn for a Vogue 1994 issue, magnifying the beauty of a headdress made by Jean-Paul Gaultier and worn by model Bridget Hall.
This JPG headdress is a mix of cultural references, taking inspiration from Indian ornaments to American-style chains and padlocks. Along with the color theme, hair and ears were silver slicked by Orlando (for Bumble + Bumble) and Brigitte Reiss-Andersen (for Jacques Dessange).
Original media
Photographer - Irving Penn
Publication - Vogue 1994
Headdress - Jean-Paul Gaultier
Hair - Orlando for Bumble + Bumble
Make-up - Brigitte Reiss-Andersen
Model - Bridget Hall
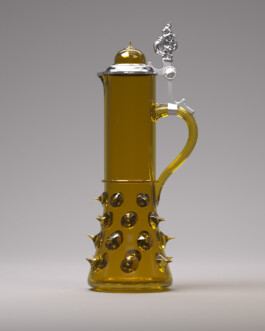
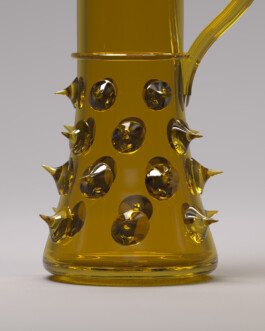
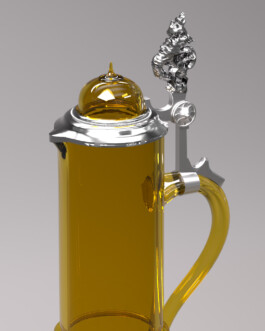
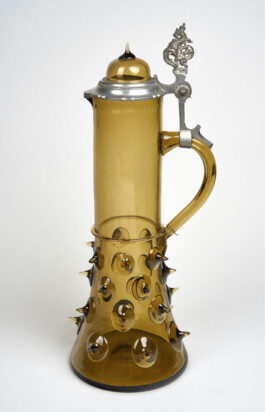
19th Century wine decanter
This winedecanter from circa 1880 is decorated with hot-applied blobs of coloured glass and a pewter lid mount. Produced in Germany, it's now resting at the Museum of Applied Arts of Budapest, Hungary.
Original media
Date of production - circa 1880
Place of production - Germany
Materials - Coloured glass; pewter lid
Techniques - Blown; hot-applied prunts
Dimensions
height: 47cm
opening diameter: 9cm
base diameter: 17,5cm
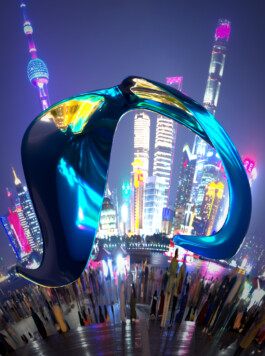
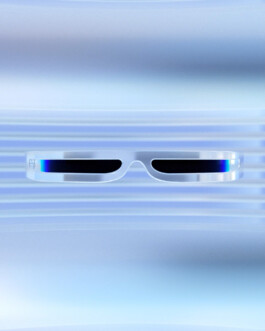
Pierre Cardin 1997 Sunglasses
Pierre Cardin Autumn Winter 1997 Sunglasses. These sleek and futuristic sunglasses were used solely as an accessory for the 1997 show, bringing sci-fi vibes to the elegant & sportive style of the collection.
Original media
Date of production - 1997
Brand - Pierre Cardin
Collection - AW 1997
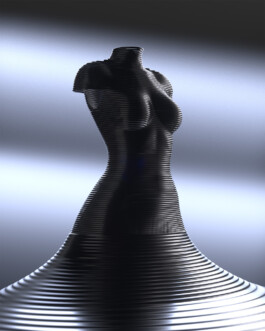
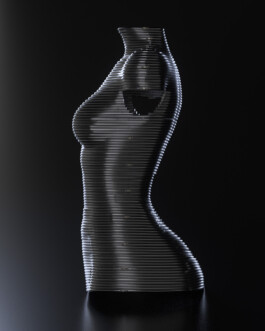
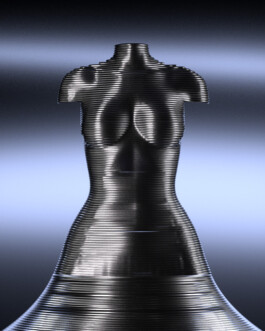
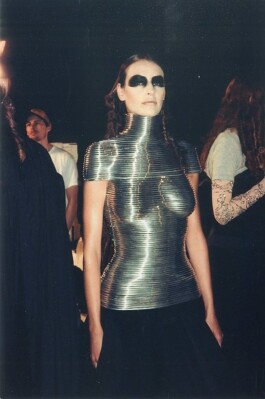
The "Coiled" corset by McQueen
The "coiled" corset from The Overlook collection by Alexander McQueen (1999) combines meticulous craftsmanship, radical body adornment and was a unique collaboration between McQueen, Kees van der Graaf and jeweller Shaun Leane.
It was made of 97 handcrafted aluminium coils. The construction is similar to that of the cuirass, the sides are screwed together, with the wearer inside. Kees van der Graaf created a plaster mould of model Laura Morgan’s torso, onto which Leane then fitted the coils.
Original reference
Date of production - Fall 1999
Corset - Shaun Leane
Collection "The Overlook" by Alexander McQueen
Plaster mould - Kees van der Graaf
Model - Laura Morgan
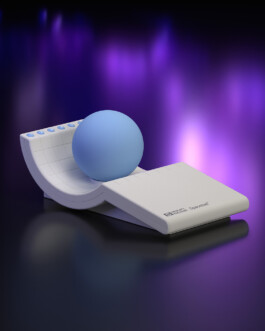
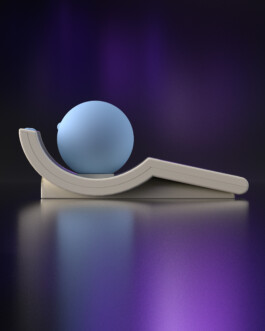
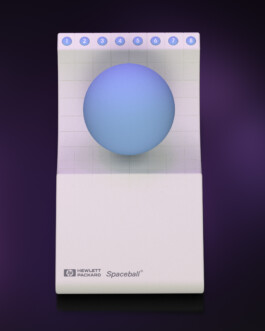
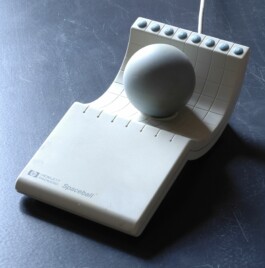
Spaceball 2003
The Spaceball 2003 built by Spacetec IMC Ltd in 1991 is a 3D trackball that allows six-degrees-of-freedom to pan, zoom and rotate 3D models quickly and easily as users build, modify and inspect their designs.
It features eight programmable buttons and a hardware zeroing button (button 8). Also has an integrated button into the forward face of the ball. It was later rebranded for several companies (IBM, HP) and replaced by the Spaceball 4000 in June 1999.
Original media
Date of production - 1991
Creator - Spacetec IMC Ltd
Brand - Hewlett Packard